These investigations are virtual adaptations of the FoodPrints Curriculum
Fractions and Fairness
Investigation Description:
Welcome students to the FoodPrints classroom. Share that throughout the lesson today, we will be exploring the ideas of fair and equal.
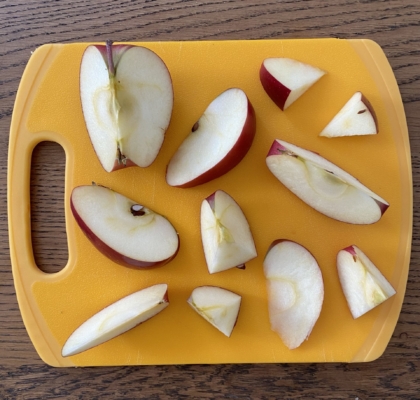
Show students two apples and explain that you are going to divide them into pieces. Cut one into equal pieces and the other randomly so that there are pieces of different sizes. Ask students which of the cut apples would be fair to distribute to the class and to explain why one would be fair and the other not fair.
To further explore this idea, draw pictures of different shapes and show how to divide or partition them into halves and fourths, making each piece equal. Use math words such as equal, half, fourth, and fraction. Explain to students that when we cook, we practice dividing what we make into equal portions when we serve a meal.
You can ask the question: are there are times when unequal portions could be fair?
Time: 10-15 minutes
Teacher Materials: Apple, knife, paper, writing/drawing utensils
Student Materials: Paper, writing/drawing utensils
This virtual investigation is adapted from: 1st Grade- Fractions and Fairness
Design a Square Foot Garden
Investigation Description:
Remind students that all living things need space to grow, and plants are no exception. However, some plants need more space than others to grow to their full size.
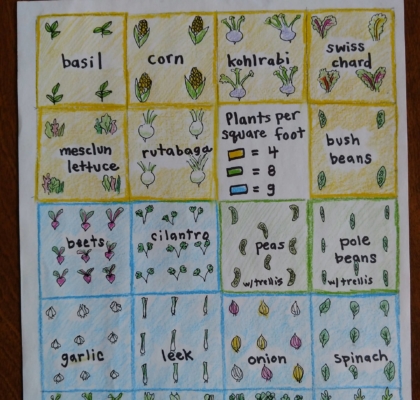
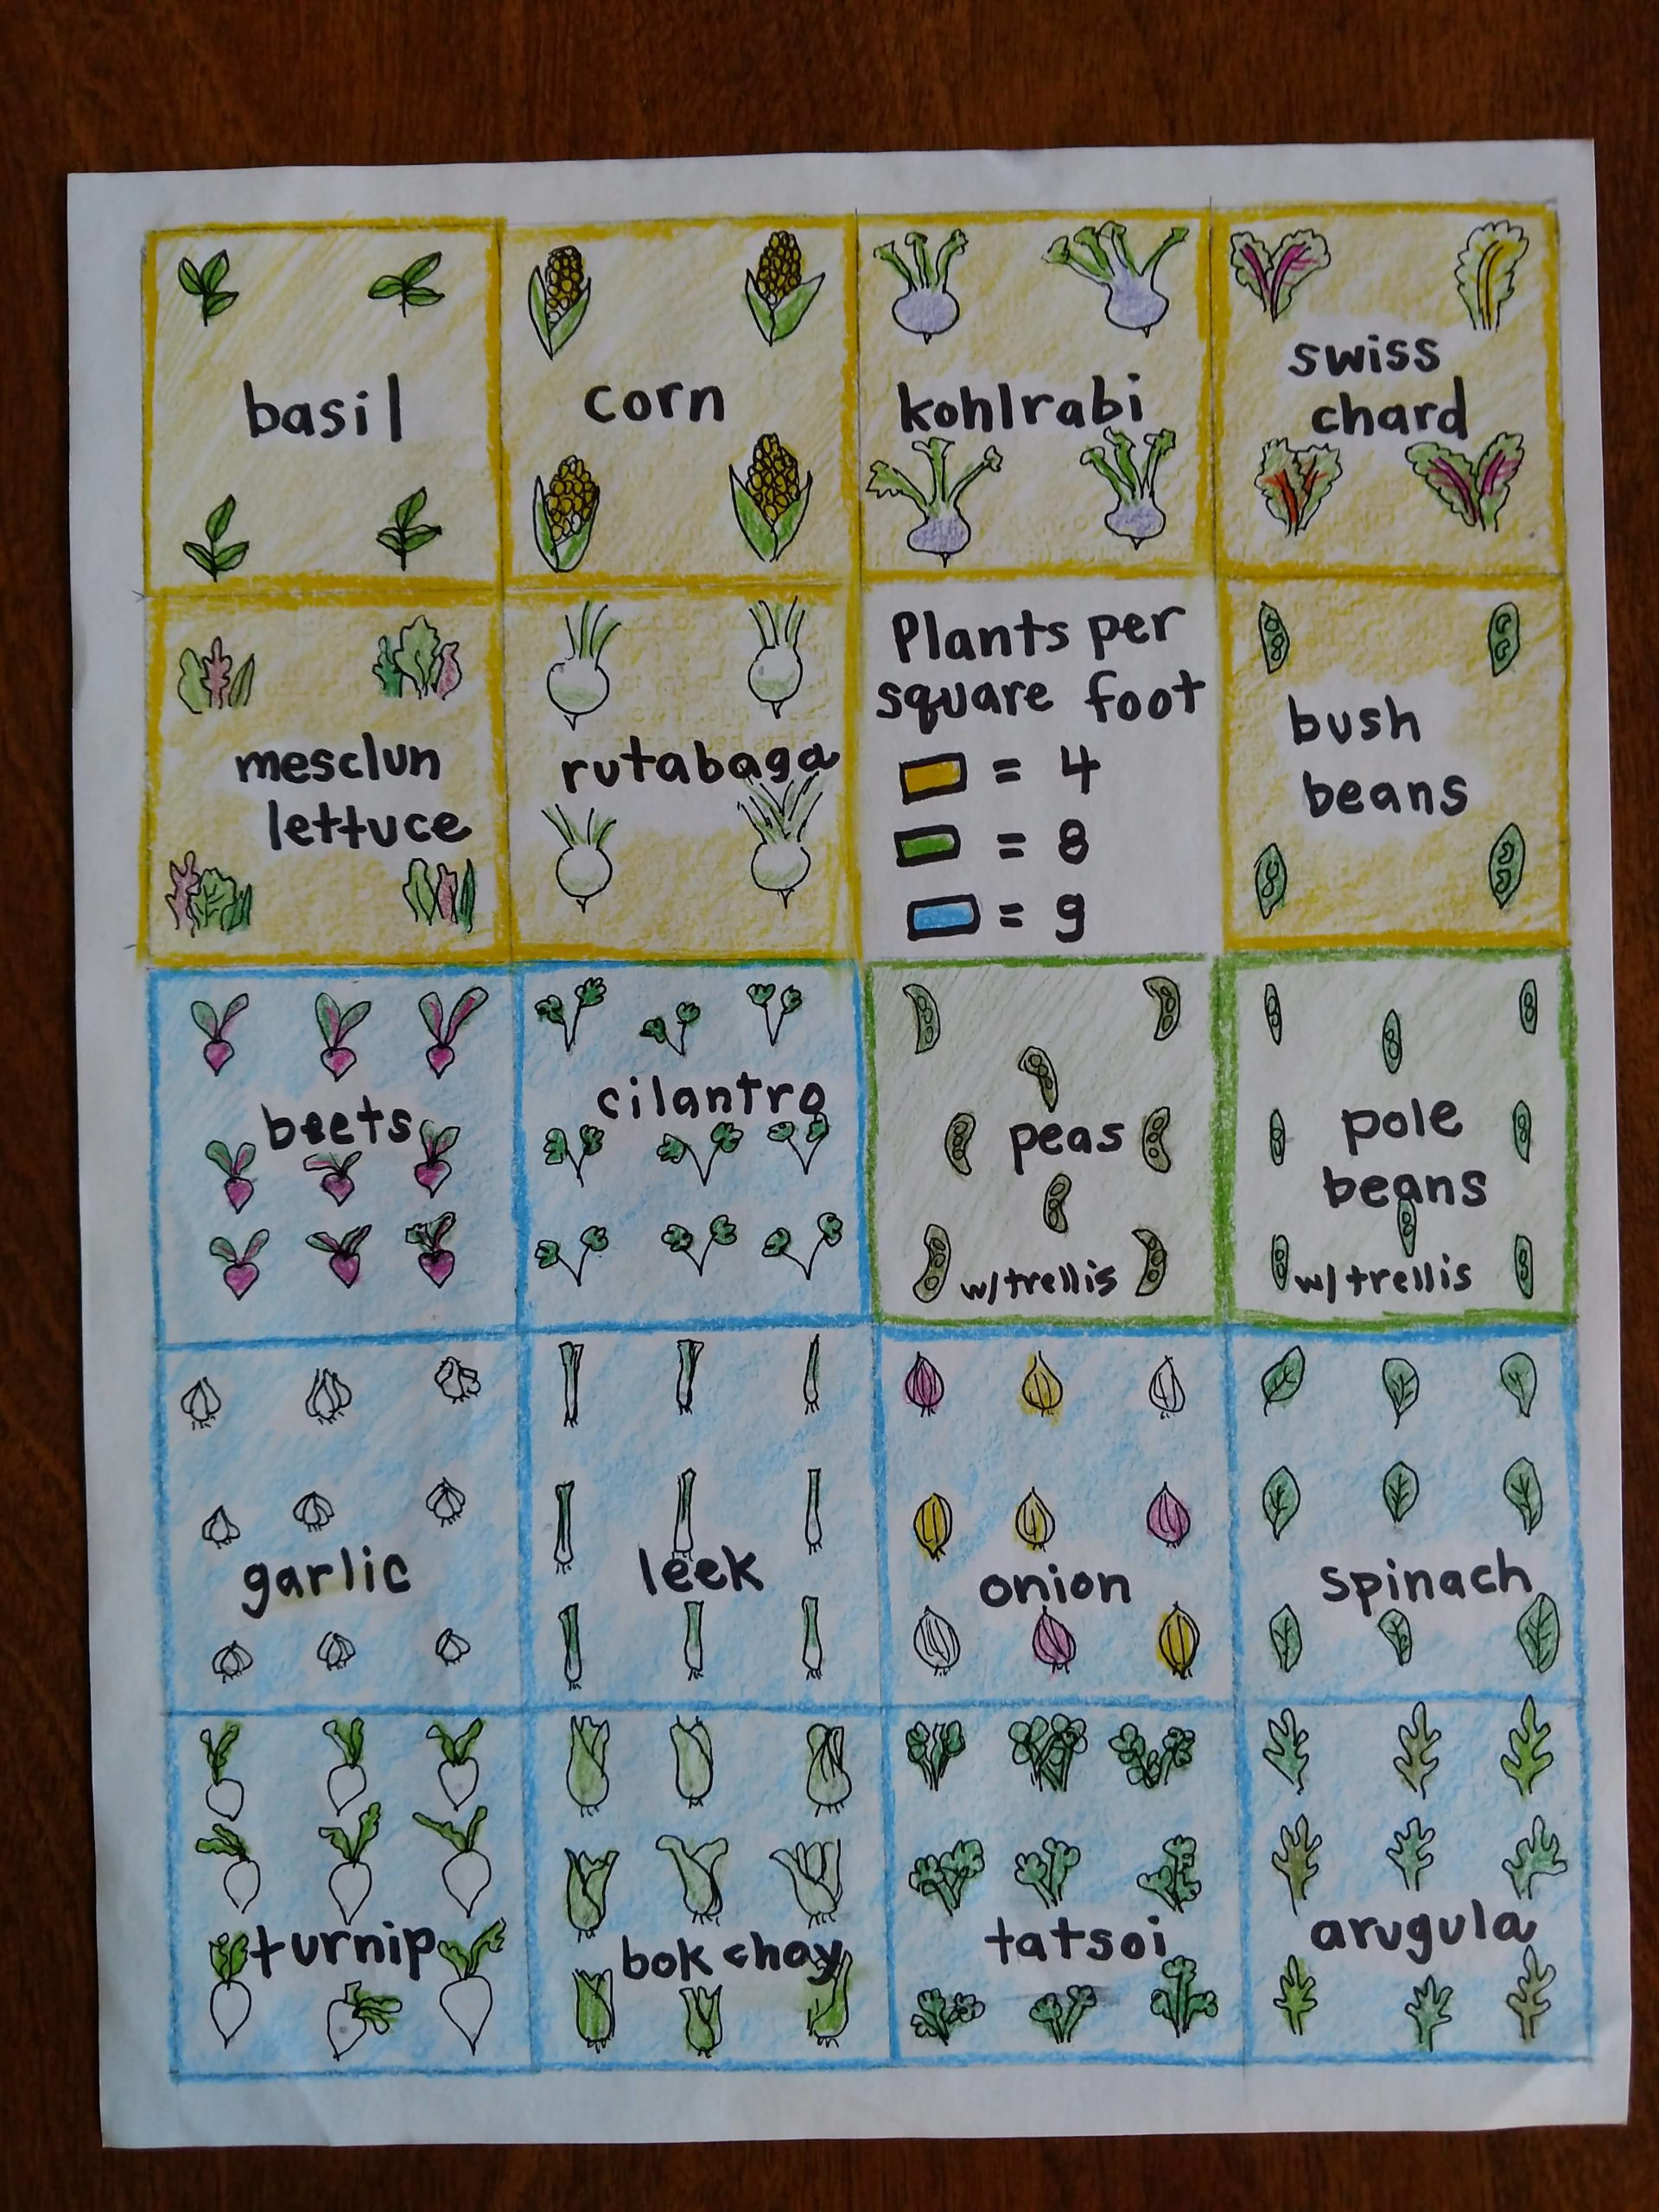
One way that gardeners can make the most of a small plot or garden bed is by using the principles of “square foot gardening” — planning what to plant in each 1-foot by 1-foot space, and having a sense of how many of a particular kind of plant can fit in that space. For instance, a large plant like a cabbage or broccoli would need that whole space, but a gardener could plant 4 smaller plants like bush beans or up to 16 much smaller plants like carrots in that same 1-foot by 1-foot space.
Ask students to design their own garden bed, based on the square foot garden plant spacing guide. You can screenshare the Square Foot Garden Planting Spacing Chart on page 11 of the lesson, or use the visual version of the chart. Both are linked in the Links section below.) You may need to demonstrate how to divide a page/piece of paper into even squares, and filling in two of the squares with images of your favorite veggies (for instance one tomato in one square, and four ears of corn in another).
Students might start planning their bed by considering which veggies they most like eating — one of the best things about gardening is getting to eat and share what we grow, after all! — and then checking the planting guide to see how many of each of those plants can fit into a square foot.
It might work best to have younger students focus on a smaller size, for instance a 2-foot by 2-foot area (4 squares), and ask older students to design a larger bed (for instance, a standard 4-foot by 8-foot school garden bed would have 32 square feet) and/or the group could brainstorm a few themed garden beds and what plants they would need to grow in them (might require looking at recipes to see what veggies are involved).
Here are some examples of theme garden components:
-salsa garden: tomatoes, tomatillos (same spacing as tomatoes), onions, cilantro, garlic
-salad garden: lettuce, spinach, carrots, arugula, radishes
-ratatouille garden: squash (one plant per 4 square feet), eggplant, tomatoes, onions, garlic, basil
-shepherd’s pie garden: potatoes, carrots, peas
-pesto garden: basil, garlic, spinach, pumpkin seeds (one pumpkin per 4 square feet)
-fried rice garden: cabbage, peas, corn, carrots, really anything….
If time allows, invite students to share their designs and/or what recipes they would like to make with their ideal garden’s harvest.
If the concept of square foot gardening seems like too much for your group, you can ask them to take the ideas of spacing and plants getting along to design their dream garden.
Time: 15-20 minutes
Teacher Materials: Poster/whiteboard and markers for demonstrating the chart making, square foot garden guide to screenshare
Student Materials: Paper, pencil, colored pencils or markers
This virtual investigation is adapted from: 2nd Grade – Garden Planning
DIY Seed Packets
Investigation Description:
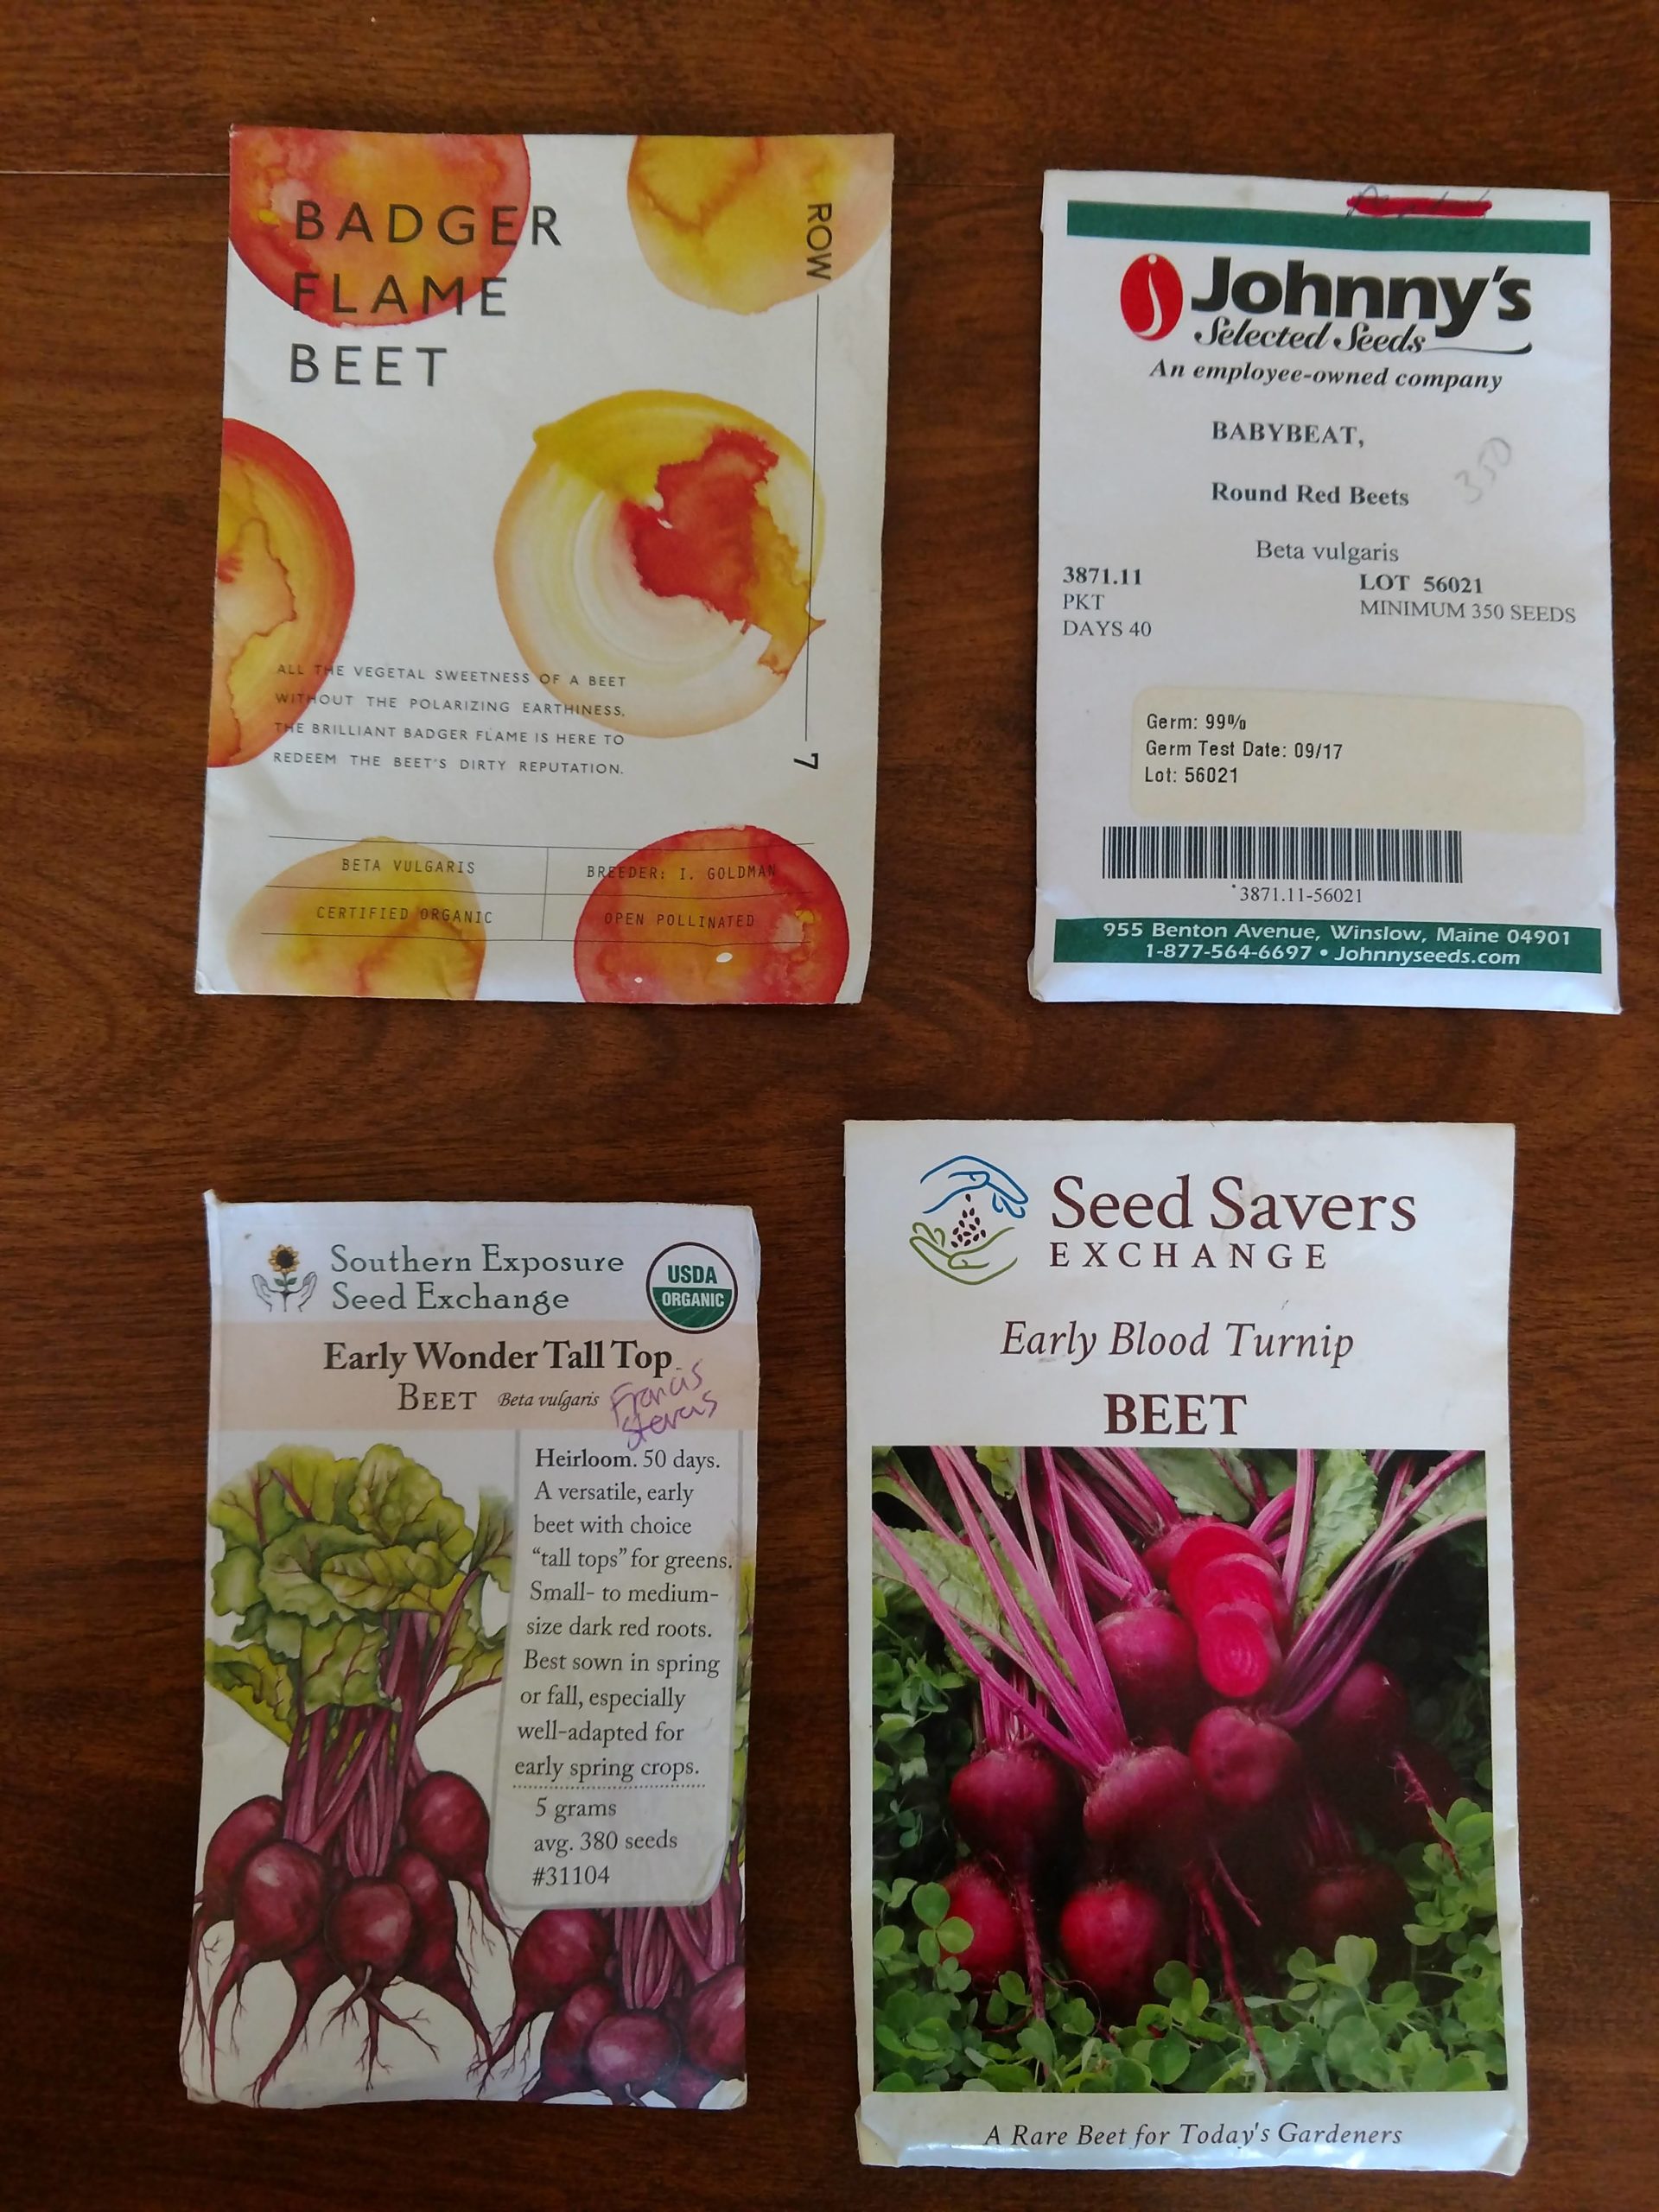
Look at a few seeds packets with your students (if students do not have seed packets at home, you can screenshare these images of packet front and back sides or hold up examples to the screen).
Ask students to consider what details are included, which designs they like the most and why. Be sure to point out that the bits of information are helpful for gardeners and farmers to know what each kind of plant needs to flourish.
Next, ask them to design a seed packet so others know what can help them flourish. It may be helpful to give them a few categories and ask for a few students to share examples before they each get to designing their official seed packet.
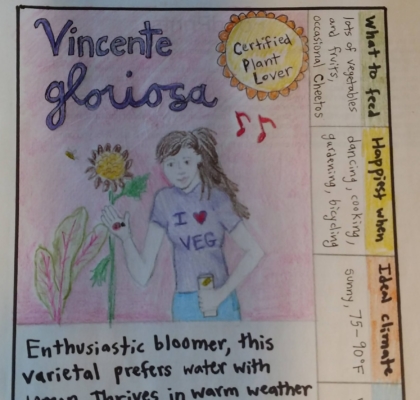
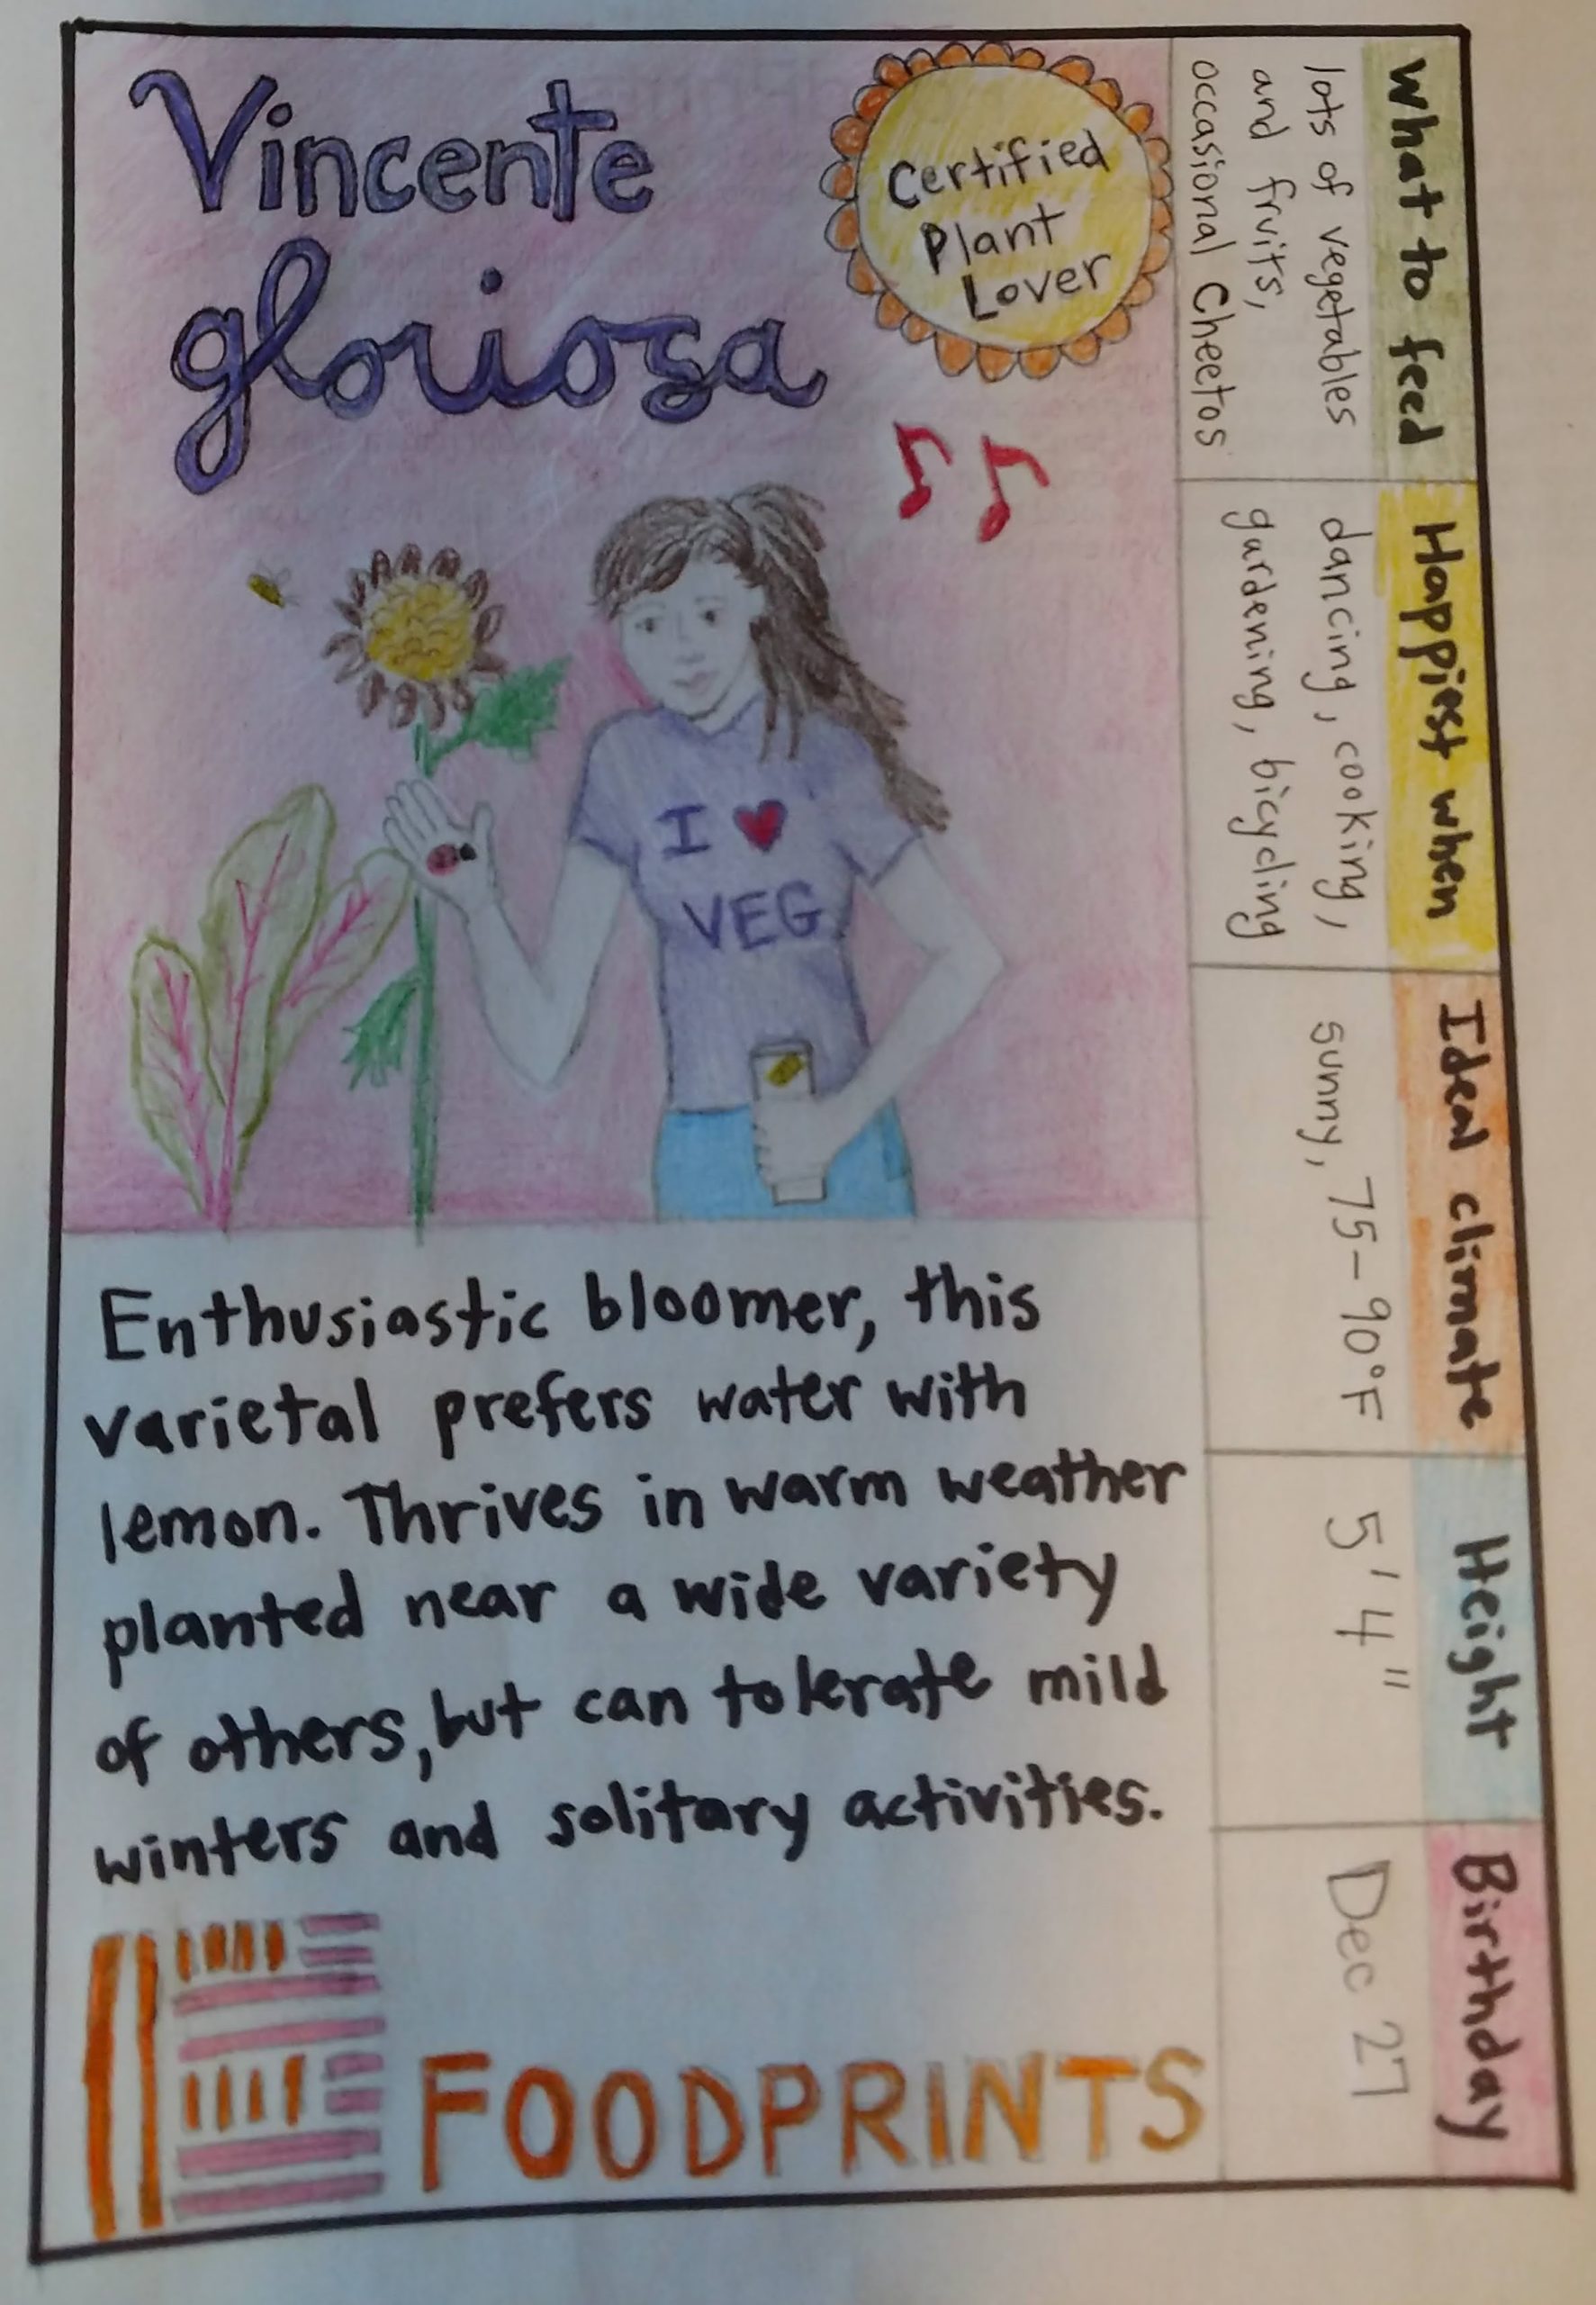
Ask students to include the following information on their personal seed packet:
-name
-image (can be drawn or a photo)
-short description
-3 to 5 useful growing facts
Some category ideas include: preferred environment/climate, favorite foods, favorite activities, how much space they need, birthday, “companion plants” (friends relatives they especially enjoy spending time with), “don’t plant near” (things they really dislike). Kids will probably come up with some good new categories, too, but remind them if they do so to be as positive as possible.
It may be helpful to show them an example of a finished seed packet.
You may want to work on your own seed packet while students work on theirs, and if time allows it would be fun to welcome volunteers to share their seed packet designs.
Time: 20-30 minutes
Teacher Materials: Seed packet images to screenshare, paper, pencil, colored pencils or markers
Student Materials: Paper, pencil, colored pencils or markers
This virtual investigation is adapted from: 2nd Grade – Garden Planning

Scaling a Recipe
Investigation Description:
Work together as a class to scale a recipe. This may be a FoodPrints recipe you have made together — there is a classic Granola Bars recipe in this lesson that works well, but feel free to swap in a different one and modify your introductory story accordingly. Share the ingredients portion of the recipe on your screen, then work together as a class to double the recipe. Explain to students that this means we will multiply the amount of each ingredient in the recipe by two. Do the math together as a class.
Students may need help visualizing the measurements, so be sure to have measuring cups and spoons with you to actually show the students what the ingredients would look like before and after doubling them.
If your students are moving through this investigation quickly, you might have them figure out a triple batch (everything x3) or a quarter batch (everything divided by 4).
Time: 15-20 minutes
Teacher Materials: Copy of the recipe, ingredients, measuring tools, and a mixing bowl
Student Materials: Paper and a writing utensil
This virtual investigation is adapted from: 5th Grade – Scaling Recipes